Go Back
Conversion optimization most commonly focuses on improving the user experience through refining UI, however it is important to not forget the first step: site performance. Page load time is one of the most common factors which influences bounce rate. In a recent Google study, 53% of mobile users abandoned sites that took more than three seconds for a page to load. This means it is imperative to evaluate and keep close tabs on web performance. In this post, we will breakdown one of the most common factors we have encountered in issues with load times: images not optimized for web.
Benefits of Image Optimization
Optimizing images for web is key as it offers opportunity for higher quality visuals (even with smaller file size), increased accessibility and visibility to search engines, and ADA compliance.
There are two main areas of focus with optimizing images for web:
- Choosing the right image format
- Choosing the right file size
Addressing these two elements, and using them to your advantage, will have a profound effect on many KPIs for your website. Let’s take a closer look at image optimization and details to consider on your journey to a fully-optimized web page.
Choose the Right Image Format
The first step to optimizing your images is choosing the correct image format, with the main goal being to optimize the number of bytes needed to encode each pixel in an image. Start by selecting from the three universally supported image formats; JPEG, PNG, and GIF.
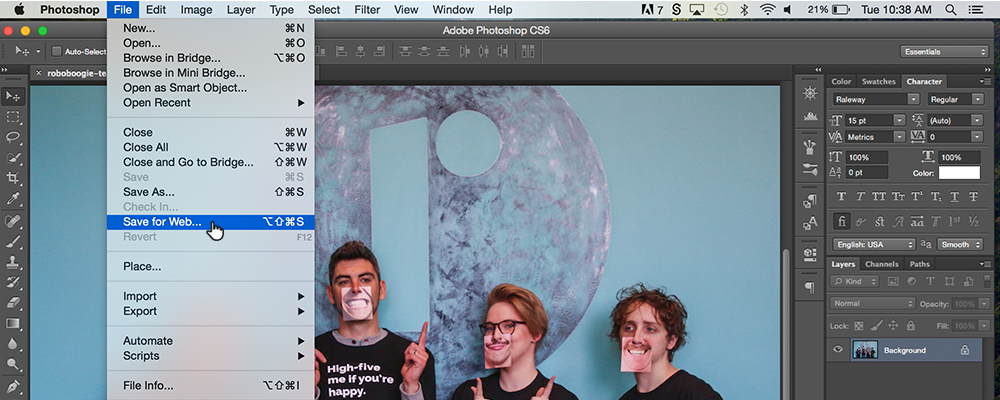
- JPEG is the most common image format on the web. JPEG applies a lossy compression algorithm, which means some of the image quality is degraded when compressing the file size. Use this image format for photos and screenshots, as it supports 224 or 16,777,216 colors. Adobe Photoshop offers a great “Save For Web” feature that works with many different formats and sizes. Toggle through different quality settings to see impact on file size and ultimately load time. The following images were optimized for web at high quality (left; 70.79K), medium quality (middle; 9.97K), and low quality (right; 5.19K).


- PNG files apply a lossless compression algorithm based on choosing the size of the color palette. PNGs should be used for files that require fine details to be preserved at any resolution. This format will provide the highest quality images, with the tradeoff of a larger file size. PNGs are also commonly used for images that require transparency (another reason they’re the right choice for logos), which JPEGs cannot be used for. For example:
- PNG-24: 24 bits per pixel (16M colors)- good for complex images with lots of color, gradients, and fine detail.
- PNG-8: 8 bits per pixel (256 colors)- good for images with simple colors like logos, UI elements, buttons, etc.

PNG-24 (Wacom) vs. PNG-8 (roboboogie)
- GIF files confine their 8-bit palette to 256 colors, and can have multiple frames. The compression of GIFs to a 256 color palette can create blotches and rendering issues in files with complex coloring, resulting in pixelation. For a limited color palette, PNG is a better selection as the images rendered for 256 colors will be of higher quality than GIFs. For this reason, GIFs should be used only for files that require animation.
Choose the Right File Size
The second step to consider is optimizing for file size. Our goal here is to optimize the total number of pixels in an image – this is where image compression comes into play.
Image compression falls into two categories: lossy and lossless. Lossy compression eliminates unnecessary pixel data, whereas lossless compression simply compresses pixel data. The result? Lossy compression filters will degrade the image quality, so you need to be careful with how much a file size is decreased. Lossless compression filters will need to be uncompressed before they can be rendered. There’s no hard-and-fast rule here as to which method is best; it’s very much a trial-and-error process, using different image formats for different purposes to see which filter or combination of filters works best.
Another element of choosing the right file size involves delivering scaled images. By serving users images that are naturally the size they appear to be on a webpage, you can reduce both load times and unnecessary pixels. For example, if you’re using a 200px by 300px image for a product catalog, best practice is to ship the image in that size rather than telling it to appear that size within the code. Loading an oversized image is not only costly to the overall load time due to the size of an image, but also because browsers have to map these images pixel-by-pixel when compressing them to their new size. This can be particularly expensive on mobile devices.
If necessary, you can always have an option for the full size image to open independently in a new tab, or in a popup modal where the image gets loaded after the document is ready. It’s important to note that the tradeoff for quality is sometimes not worth a quicker load time. Each case is unique, so keep the user in mind when you are optimizing images. Go with the smallest file size that doesn’t compromise your requirements for quality.
Additional Items to Consider
While image format and image size are two fundamental components to effective image optimization, there are a couple additional items to keep in mind.
Avoid Encoding Text in Images
Remember to use web fonts when possible to avoid confining text to images. Encoding text within images results in poor experience, as the text therein is not selectable, not zoomable, not accessible to screen readers, and not searchable. Responsive typography should be utilized as it’s own design element, and has the aforementioned capabilities that image text lacks. Text also has the benefit of rendering much more quickly over a call to grab an image and load it.
Name Your Files Appropriately and Assign Alt Tags
Always use image alt tags. Alt tags are essential for effective SEO, and make sure pages are accessible to screen readers and users with disabilities. Despite their necessity, alt tags are often under-utilized or omitted entirely from some web pages. Make sure to assign alt tags to all images, and name all images with descriptive words in common language. Search engines not only crawl the text on a webpage, but they also search for keywords within your code and image file names. This means assigning alt attributes to your images and using descriptive titles will have gains in search engine appearances as well.
Let’s take the following photo of roboboogie UX/UI Designer Lacie Webb, for example. As originally uploaded, the file name was “IMG_0681” which doesn’t provide crawlable benefits or context for readability. Adjusting the file name to “roboboogie-ux-designer-lacie-webb” before uploading will provide preliminary information about the content of the image. Additionally, the alt tag shown below, “Photo of roboboogie UX/UI Designer, Lacie Webb,” further supports the context (and benefits) we are looking for. In short, if you want a search engine to interpret the subject of an image, you need to tell it what that subject is in plain text, via the image title and the alt tag. Keep in mind these elements affect the source URL, which also clues browser in on the details of a page when named appropriately.

By implementing these strategies for image optimization, you’ll notice significant improvements in web performance and your users will have a better on-site experience. Good luck and happy conversions!
Written by Andrea Pappoff


